How to Remove Scratches from Leather: A Practical Guide
Not every leather scratch needs the same fix. A faint surface mark, a scuff in the finish, and a deeper cut may look similar at first, but they respond to very different methods. The safest way to avoid making the damage worse is to identify what kind of mark you are dealing with before you apply any product.
Step 1: Assess the Severity of Damage
Start by checking whether the mark is a light surface scratch, a scuff in the finish, or deeper damage. Look at it under bright light and feel it gently with a fingernail. If the color is intact and the line softens with light buffing, it is likely superficial. If you see a pale line, rough edge, or a visible break in the grain, treat it as deeper damage. If it looks dull and rubbed rather than cut in, it may be a scuff instead of a true scratch.
Note the size, location, and leather type—natural, faux, dyed, or aniline. Photographing the area from multiple angles helps you classify the damage accurately and rule out dirt or salt buildup. When in doubt, test any product on a hidden spot first.
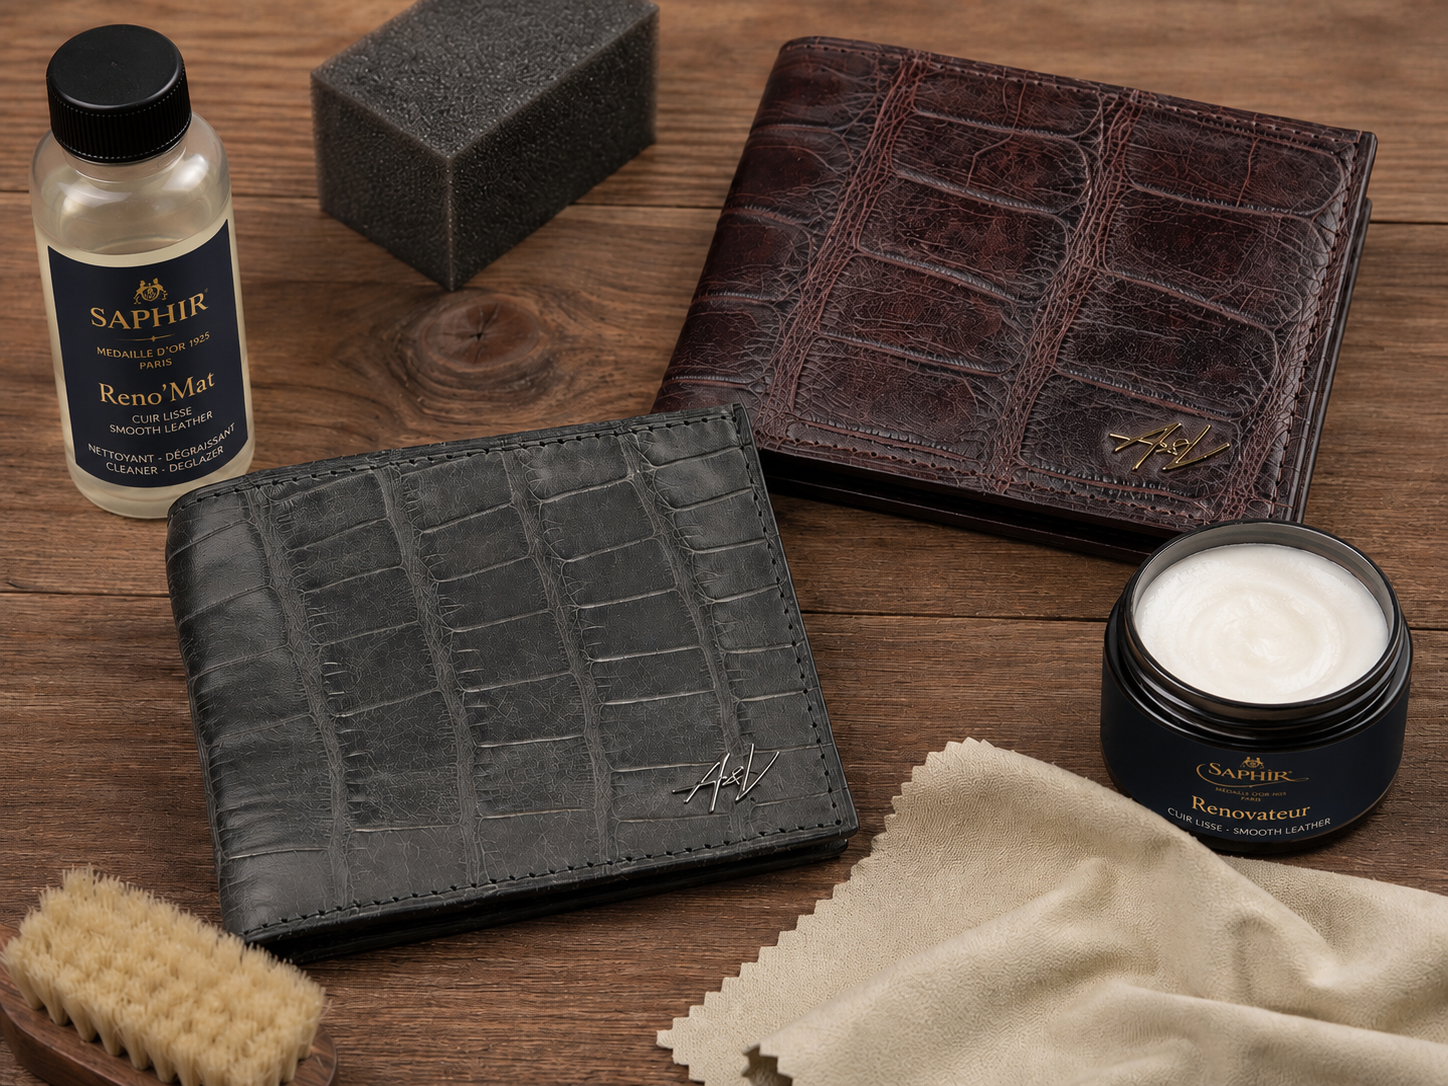
Step 2: Removing Light and Surface Scratches
For a light surface scratch, start simple: a small amount of leather-safe conditioner and gentle buffing are usually enough for a first attempt. Always test first if the leather is light-colored, absorbent, unfinished, or otherwise easy to darken unevenly.
Step 1. Clean the Surface
Remove dust with a dry microfiber cloth. If needed, lightly wipe with a damp (not wet) cloth without alcohol, then let the leather air-dry completely.
Step 2. Choose Your Product
For a light scratch, a small amount of conditioner is usually the safest first step. It may soften the finish enough to make the line less visible, but it will not rebuild missing material. If the scratch stays pale, rough, or clearly cut into the surface, stop applying more product — that usually means you have moved beyond simple conditioning and into repair territory.
Step 3. Application
Apply a small amount to a soft cloth rather than directly onto the leather, then buff the mark lightly. Watch the surface as you work: if the scratch begins to blend in, stop there; if the area darkens unevenly or starts to feel greasy, stop and let it dry before doing anything else.
Step 4. Buffing
Let the product settle briefly, then buff with a clean, dry cloth until the surface looks even. Do not keep adding more product just because the mark is still visible after the first pass.
Step 5. Repeat if Needed
If the mark still looks the same after a careful first attempt, you can try one more light application. If there is no visible improvement after that, stop. More product usually will not solve a deeper scratch.
Step 6. Protect the Area
If the treated spot looks slightly different from the surrounding area, blend only the adjacent section and only if the product is suitable for full-surface use on that type of leather. On light, delicate, or absorbent finishes, treating a larger area can make the mismatch more obvious rather than less noticeable.
Step 7. Common Mistakes
Don't pour oil directly onto leather, scrub aggressively, or use alcohol-based cleaners. These actions can worsen the damage and create halos. Buff gently without pressure.
What this usually means in practice
In practical terms, most faint surface marks can be softened, but not every scratch can be erased. If the mark looks shallow and the color is still intact, a light cleaning and conditioner may be enough. If you can see a pale line, broken grain, or rough edges, this is no longer a simple care decision. At that point, the real question is whether the item is worth a cosmetic repair attempt or better handled by a professional.
If you are unsure what to use, conditioner is usually the safer starting point for finished leather. Oils may temporarily darken a light mark, but they are harder to control and more likely to leave uneven patches or residue — especially on light-colored, aniline, or unfinished leather.
Step 3: Repairing Deep Scratches and Cuts
Once a scratch has broken the surface, this is no longer a simple care issue. You may be able to reduce how visible it looks, but a home repair is unlikely to restore the original texture and color perfectly. On high-visibility items, deep scratches are often where DIY shifts from “helpful” to “risky.”
Step 1. Prep the Area
Clean and degrease the spot. Carefully trim any protruding fibers. Protect surrounding areas with masking tape to prevent spreading.
Step 2. Fill the Damage
Apply filler in thin layers and let each layer set before adding the next. Use only gentle drying if the product instructions allow it, and avoid pushing heat into the repair just to speed it up.
Step 3. Add Texture
While the layer is still tacky, impress the matching grain pattern using the kit's texturing tool or a piece of textured film.
Step 4. Color Matching
Apply dye in thin, semi-transparent coats, blending with the surrounding leather. Dry between applications.
Step 5. Seal the Repair
Cover the area with the kit's protective finish or sealant. Buff lightly with microfiber.
Step 6. When to See a Professional
Seek professional repair when the damage has broken the surface, sits near a seam or edge, affects a highly visible panel, or would be expensive to get wrong. This matters even more with premium, sentimental, or hard-to-match items, where a mediocre DIY repair can lower the value or make the damage more noticeable than before.
Step 7. Drying and Quality Check
After any repair, let the area dry fully before judging the result. Do not rush with aggressive heat, and do not keep layering product just because the first pass looks imperfect. Excess heat and overworking the area can stiffen the leather, distort the finish, or make the repair more obvious.
Suede & Nubuck: Reduce Scratch Visibility
Suede and nubuck should be treated separately from smooth leather. Products made for finished leather can darken the surface, flatten the nap, or leave the texture looking patchy, which is why dry methods are usually the safest place to start.
Step 1. Dry Erase
Avoid wet cleaning unless you are using a suede-safe product and understand how that material reacts. Excess moisture can flatten the nap and leave tide marks, which is why dry tools are usually the safer first step for light marks.
Step 2. Raise the Nap
After erasing, brush with a soft brass or crepe rubber brush in one direction. This lifts compressed fibers and redistributes the texture, making shallow scratches less visible.
Step 3. Suede Spray Restorer
Apply a suede-safe restorer spray evenly from a moderate distance and let it dry fully before brushing or judging the result. Always follow the product label if it gives more specific instructions for that formula.
Step 4. Protective Spray
Once dry, apply a water- and stain-repellent spray formulated for suede. This prevents future damage and keeps the nap flexible.
Step 5. Test First
Always test erasers, brushes, and sprays on a hidden area to ensure they don't alter color or texture.
| Action | Allowed | Forbidden | Why |
|---|---|---|---|
| Cleaning | Dry eraser, brass brush, suede-specific spray | Water, oils, standard leather conditioner | Water flattens nap; oils create dark spots |
| Restoration | Nap-lifting brush, suede restorer spray | Filler, dye, heat guns | Fillers clog texture; heat melts delicate fibers |
| Protection | Suede protector spray | Silicone sprays, wax-based products | Wax and silicone seal pores and flatten pile |
Household "Hacks" to Avoid: Risks and Safe Alternatives
Household shortcuts are popular because they are easy to try, not because they are reliable. The usual problem is not that they do nothing, but that they make the surface look better briefly and worse later.
| Product | What They Promise | What Really Happens | Risks | Safe Alternative |
|---|---|---|---|---|
| Vaseline / Petroleum Jelly | Quick shine, hides marks | Leaves sticky film that attracts dust and grime | Buildup on surface; uneven aging; stains clothing | pH-neutral leather conditioner |
| Distilled White Vinegar | Cleans and softens | Strips natural oils; can lighten color | Dries out leather; causes cracking over time | Mild leather cleaner (pH 5–7) |
| Colorless Shoe Polish | Blends scratches | Contains waxes that build up and dull finish | Clogs pores on aniline leather; creates hazy layer | Color-matched leather dye or neutral cream |
| Coconut Oil / Olive Oil | Moisturizes and darkens | Penetrates unevenly; attracts dust; goes rancid | Sticky residue; discoloration; accelerates breakdown | Leather-safe conditioner made for that type of finish |
| Skin Moisturizer / Hand Cream | Softens scratches | Fragrance and additives can stain or alter color | Unpredictable reactions; may cause spotting | Fragrance-free leather conditioner |
| WD-40 | Removes scuffs | Can leave residue, alter the finish, or make the surface more brittle over time | Long-term brittleness; surface film | Purpose-built leather scratch remover or conditioner |
Household shortcuts usually fail in the same way: they improve the mark briefly, then leave the surface darker, patchier, or harder to fix cleanly. If the item matters, improvisation is usually the more expensive mistake.
How to Protect Leather and Prevent Future Damage
After treating a scratch, the biggest risk is usually over-treatment. Keep the surface clean, reduce repeated friction, and resist the urge to keep adding product just because the mark is still visible. This is especially important for frequently handled accessories such as iPhone 17 PRO Max cases, which are regularly exposed to pockets, bags, keys, and hard surfaces. A small scratch often looks better with restraint than with repeated attempts to force a perfect result.
FAQ
What if the scratch is on patent leather or faux leather (PU)?
Patent leather and faux leather should not be treated the same way as natural leather. Patent finishes can show surface damage differently because of the glossy coating, while faux leather may react poorly to heat, solvents, or products designed for genuine leather. In both cases, mild cleaning is usually safer than trying to condition or fill the area as if it were real leather.
Will conditioning darken my light-colored leather?
It can, especially on aniline or vegetable-tanned leather. Always test conditioner on a hidden spot first, particularly when treating a light-colored leather wallet or another accessory where uneven darkening will be easy to notice. Use products labeled "neutral" or "colorless" and apply thin coats. Darkening is often temporary and evens out as the conditioner absorbs.
How do I know if a scratch is too deep for DIY repair?
If the scratch exposes the inner layer, sits on a seam or edge, affects a highly visible panel, or would be costly to get wrong, professional repair is usually the safer choice. Deep repairs often fail not because the damage is impossible to fill, but because the color, sheen, and texture are hard to match convincingly.